Do you struggle with those keyboard stickers, don't know how to apply them? Fearing that you might damage them in the process? Fear no more.
We at Keyshorts use one-by-one method, which requires about 15-20 minutes to complete, but it is the most reliable and precise way we know about. We're not fans of transfer film and we don't use that method - if you have stickers with transfer film attached, jump here. If you have Keyshorts stickers, watch the 1-minute video to see how to apply them:
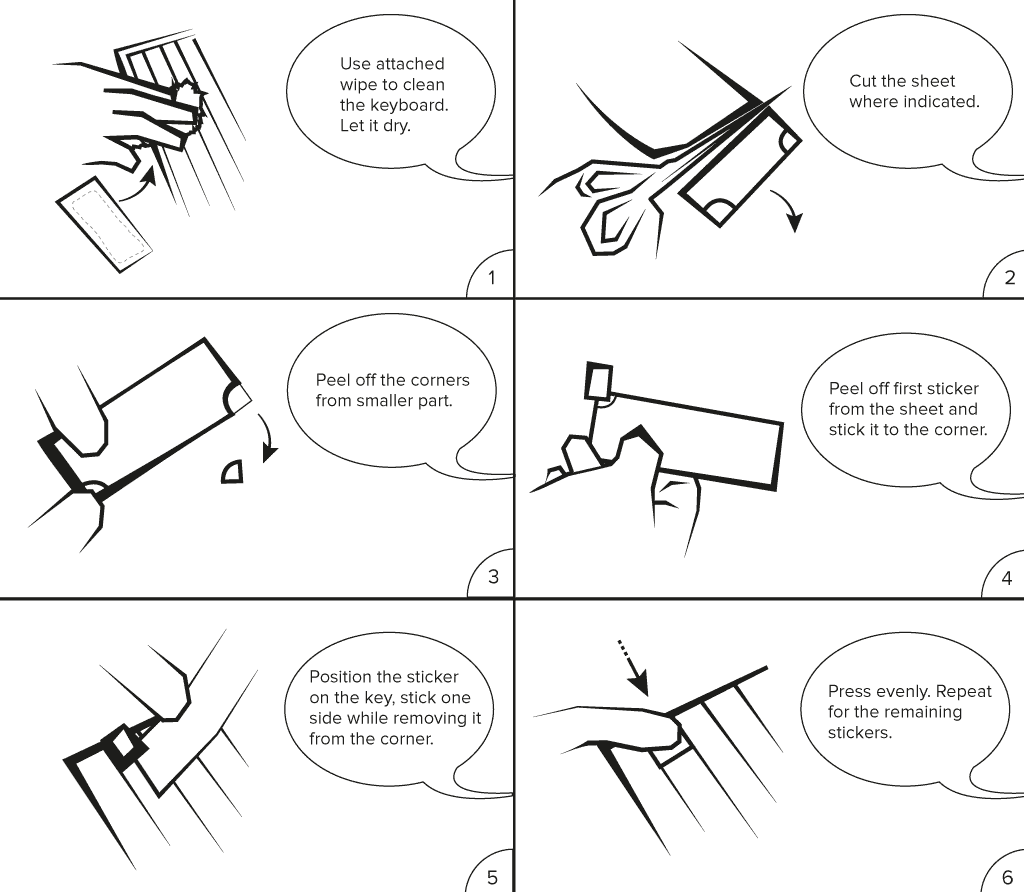
or check out our infographic (always included with the stickers):
Transfer film method with third-party stickers
Keyshorts stickers don't support application using transfer film, because this method is troublesome and the result is often far from perfect. Yes, it's quick, but in most cases you'll need to manually reposition off-placed stickers by hand, which takes time.
To apply any third-party stickers to the keyboard using transfer film, do this:
- Clean your keyboard using wipe with some alcohol (to remove the grease).
- Take transfer film and remove it from its backing.
- Slowly stick transfer film to the surface of the sticker sheet, smooth it out using credit card or something similar.
- Slowly start to peel off transfer film (it should peel off with small stickers on it).
- Position the whole set above the keyboard. When you're ready, start to stick transfer film with stickers to the keyboard. Smooth it out and press using credit card or something similar.
- Slowly and gently start to peel transfer film from stickers (they should stay on the keys).
- Clean the stickers from the transfer film glue (can feel a little sticky).
That's it. If you were lucky, everything went perfect. Be careful on steps 3 and 5, as there is high probability that either transfer film won't "lift" all stickers from sheet, or won't leave all stickers on keyboard, or both.
You'll also have to remove the transfer film adhesive from the stickers, because otherwise typing can be frustrating. Before you do that, make sure your third-party stickers have overlaminate that protects the artwork. If not, you could be wiping the ink from the stickers (!).
We protect artwork on our non-transparent keyboard stickers with overlaminate by default. That's why typing with Keyshorts stickers feels very natural.
If this article helped you in any way, please spread the guide with the world 😀 Thanks!